Friday, September 30, 2011

More fall fun!


The suspense has been killing you I know.  You have been laying awake at night wondering what I put in those hurricanes on my mantle.  I didn’t want the traditional fall leaves, pumpkins or anything natural looking, which is my norm.  I wanted something whimsical & colorful to go along with my new garland.  Remember this?

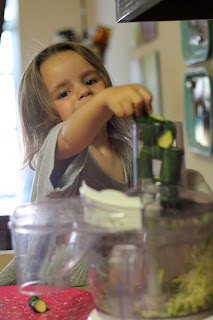
Yes, I know you can't really see the garland but with a kid this cute who cares?
So we dyed rice..  I’ve dyed pasta in the past and quite frankly wasn’t impressed with the results.  The colors looked a little anemic and the pasta lost it’s shape.  But I thought an experiement was in order so I bought a 10 lb. bag of cheap white rice, gathered up 2 big bowls, a couple of spoons and some food coloring.   Ten minutes later we were on our way outside after I swept up the rice each kid had flung stirred onto the floor!


Take it from me, dying rice is an outside activity.   Especially since the first step is to dump some rubbing alcohol over the rice.  I picked up a bottle at Wal-mart for less than a dollar that had a squeeze bottle type top on it.  Brilliant I tell you.  The big one did the squeezing.  


Though the tutorial I was using said to be sparing with the alcohol, I wasn't.  We added enough so that the rice all looked damp.  Be prepared to add the food coloring right away, several drops at a time directly on top of the rice.  Stir fast too because the alcohol dries fast, especially in the full sun when it's 100+ degrees!  Just keep stirring until all the rice is dyed.

Plastic grocery bags worked great for setting the rice out in the sun to dry.
For the orange, we added the yellow and red directly to the rice.  It ended up being this awesome variegated irregular blend.  That’s kind of like my sanity most days.  For the brown rice, I knew I wanted a more consistent color so we mixed up in a small bowl a lot of red & yellow food coloring added in some green and a little blue until it looked like a deep reddish brown.  We added some alcohol to the bowl in addition to squirting it on top of the rice.


We ended up dying the brown rice twice b/c it wasn’t dark enough the first time.


Surprisingly dying the rice ended up being a blast.  I can totally see doing this in springy colors for Easter and varying shades of green for St. Pat’s.  And for Halloween, I'm going to layer orange, yellow and white undyed rice for a candy corn look.  Can't wait!

Fall Decorations

We finally got all our Fall projects completed.  Yeah, just in time to break out the Halloween decorations but hey I get points for follow-through, right?!  Here are our masterpieces:


And they are all Pinterest inspired!  Clearly I spend too much time pinning but that site is so addicting.  The best part is that the kids had a hand in each and every project.

These little beauties were made almost entirely by the boy!  Daddy cut the wood and I put the tape for the lines.  He did the painting, sanding and glazing by himself.  He's a crafty mama's pride & joy!


The tree may be my favorite though.  I have a feeling that years from now, this will still be proudly displayed every Fall so that I can see just how tiny their fingerprints were.


They were all very easy projects to hand over the reins to the kiddos.  Try looking at all those Pinterest projects from that perspective.  A few years from now they may be treasured masterpieces!


Wednesday, September 28, 2011

Sewers... Sewists... People who sew...


il_fullxfull.261516723.jpg


So, if you have a sewing machine and create things out of fabric what are you?  A sewer?  No, thanks.  A Sewist?  Maybe.  Seamstress doesn't really work well for me.  It's not really craft and creative sounding.  Well, whatever you call yourself, if you have a little girl and she likes dresses check back in soon.  I'm working up a tutorial for a ruffled pillowcase dress that is super easy.  I love sweet little pillowcase dresses.  I've recently discovered another style I love, a peasant dress.  I've been afraid of sleeves but I picked up a pattern from Hobby Lobby for $.99.  Well, it worked! 

And guess what?  Simplicity patterns are on sale at Hobby Lobby again this week.  If you're interested in creating a sweet ruffled dress for a little girl in your life, pick up pattern # 5695 this week!  And don't worry if old style brownish tissue paper patterns aren't your thing.  We're going to toss the directions out the window and have a little fun!

Tuesday, September 27, 2011

Pumpkin Muffins

We have food allergies in our house.  Saying it was challenging at first is a bit of an understatement but we adapt, learn and grow.  I learned how to cook (still don't love it but I do it daily and some things turn out yummy I've been told).  I learned to adapt recipes to replace the eggs and dairy.  Our whole family has adopted a new diet: a weird mix of vegan, vegetarian, real food and otherwise far healthier than we ate prior to our food allergy "blessing."

Sometimes when we share our treats with other people, no one guesses that it's dairy free, egg free and usually cooked from real food ingredients.  A frequent recipe request is for the pumpkin muffins that we often share at MOPS, preschool or even birthday parties as pumpkin cupcakes when topped with a little cream cheese flavored icing.  If you're looking for a dairy free version of cream cheese icing.  Check out the Pillsbury Easy Frost, cream cheese flavor but no dairy.  Don't read the ingredients though.  The level of chemicals is extreme but dairy free icing options are pretty limited.  Everything in moderation, my friends.

Want a little Fall yumminess?  Gather up your ingredients:


2/3 cup butter (Earth Balance if you're vegan or dairy free works great, Smart Balance Light will work too)
1 1/2 cups sugar (I use Turbinado Raw Sugar but I'm going to experiment with honey and maple sugar soon)
1 can pumpkin
1 cup orange juice
1/3 cup vegetable oil, 1/3 cup water and 3 teaspoons baking powder, mixed together (I'll explain more later)
1 tablespoon baking powder
2 teaspoons baking soda
2 teaspoons ground cinnamon (make them heaping teaspoons!)
2 teaspoons ground cloves (a little extra too if you want)
4 cups whole wheat flour

Start with creaming together butter and sugar.


An adorable helper is required of course!  Next add the pumpkin, orange juice, 1 tablespoon baking powder, baking soda, cinnamon, and cloves.  Mix it all up until it's well combined.  


In a separate small bowl or measuring cup mix together the oil, water and 3 teaspoons baking powder.  This is your egg.  Be precise in your measurements here.  And pour this one in yourself.  If your adorable little helper misses the bowl, your muffins will be horrible.  Not that I know from experience or that I fed those nasty muffins to a house full new friends before tasting them myself.  Anyway, just take my word for it.  I'm sure there's some scientific explanation for the balance of ingredients but since I don't get the science behind cooking then I have no clue why it has to be precise.  Don't try to explain it to me.  My eyes will glaze over as I stare into space, just ask my husband.


Combine it all together again.  Add the 4 cups of whole wheat flour last.  This recipe makes a big batch of batter so its easier to combine it all if you add the flour last.


I usually make a dozen large muffins and a loaf of pumpkin bread with this recipe but bake it up however you like.  Mini muffins are perfect for sharing with a group.  Bake muffins and mini muffins at 350.  I bake the loaves at 325.  Any higher and it doesn't bake evenly, drying out the tops and sides before the inside gets done.

I added some pumpkin seeds to the top of this batch.  Yummy!

Mini muffins bake for about 12 minutes, muffins around 17, and bread for about 40.  Test with a toothpick for doneness.  Any version freezes well.

The smell of pumpkin muffins in the oven just feels like Fall, even if it is still 90+ outside!

This one's for you MM :)


Tuesday, September 20, 2011

A place for everything and everything in its place.

I love to organize.  Like when normal people are relaxing with a glass of wine and watching a beautiful sunset, I can be found cleaning out random drawers, cabinets or closets.  It soothes me.  I think I need a 12 step program.

There is something to be said though for the throwing out of the old.  It's freeing.  You're relieved of the burden of clutter of unneeded or unnecessary "stuff."  And, really, who needs "stuff" weighing them down.

One of my favorite organizational tools?


Ignore the dorm room white board on the wall.  Love the functionality but trying to figure out how to improve the aesthetics.  Suggestions??

That's right, an over-the-door shoe organizer.  I have three in my house right now and not a one is graced with a pair of shoes.  My most used is the one inside my pantry door.  I have pens, paper, flashlights, scissors and well pretty much everything that one shoves in a kitchen drawer.  Don't deny it, you have one.  Maybe it's hiding in your office but it's there.  I have a love affair with this organizer.  I can see everything at a glance and  at my fingertips when I need it but hidden away when I don't.

Note the lack of pretty labels.  Yes, I'm lazy but this time it's purposeful.  I like being able to move things as our needs change.  My 2 year old is currently being allowed access to the scissors whenever she desires.  Until she cuts her own hair.  It's inevitable really.  Then she'll force me to enact logical consequences and move them back up where her brother can get them but she can't.  She'll still be able to see them.  It's a discipline & organizational tool in one.  See, I said you would love it.

While I recommend the clear plastic kind for the pantry, it's not my favorite in the rest of the house.  I have the canvas/mesh kind inside our toy closet door where it holds things like matchbox cars and dress up accessories (Yes, they are organized by theme.  Can't have the pirate eyepatch sharing space with the feather boas can we?).  The top is currently empty because I want the kids to be able to access their play stuff whenever they want.  I'm considering another clear plastic version for some type of Lego storage.  Did I hear an, "Amen!" to trying to organize the legions of Legos that invade a house occupied by a boy child?

Our coat closet is the third door occupied by an organizer.  Right now the pockets are filled with sun hats & sunglasses.  Hmm, just occurred to me to add the sunscreen.  It's still almost 100 degrees but in a couple months the sunny outdoor gear will be replaced with hats and mittens.  Each pockets holds a matching set.  It works brilliantly.  No more digging for matches!  And everything within a kids' reach and just inside the entry door.  Self-sufficiency is a good thing.

Everything has a place.  Nothing simpler than that.

Monday, September 19, 2011

Thunder

I had a witty and intelligent post scheduled for today.  But we got a little much needed rain last night.  And I'm grateful.  Truly.  But the little bit of rain was accompanied by lots of thunder which means that a terrified two year old was clinging to me until well after 2am.  Needless to say no one got much sleep.


So, all plans are out the window and it's time to pull out the Plan Zzzz activities.  The ones where we focus on just being.  Chores, projects, housework and anything with real educational value all slide.  The goal of the day is just being together.  We celebrate finding comfort in a hug and a reason for getting up in the morning in a sleep deprived smile.

So we spent the morning baking and this afternoon will be fort building and snuggling up for a little family movie time.  What did we bake?  Chocolate Chip Vege Muffins.  Yummy and the added veges relieves any guilt I may have in foregoing productivity today.


Here's the recipe:

2 cups total grated zucchini and carrots
2 1/4 cups whole wheat flour
1/2 cup raw sugar
1-2 tablespoons agave nectar
1 teaspoon baking soda
1 1/2 teaspoons vanilla extract
2 tablespoons butter, earth balance, or oil
3 tablespoons vegetable oil, 3 tablespoons water and 2 teaspoons baking powder, mixed together in a separate bowl
1/3 milk, soy milk, or almond milk
mini chocolate chips

Preheat oven to 400 degrees.  Combine all except last ingredient in a large mixing bowl.  Add milk 1/3 cup to start with, adding more until the mix resembles thick cake batter.  The amount of milk needed will depend on how moist the zucchini and carrots are.  Now it's time for the good part.  Add in a 1/4 cup or so of mini chocolate chips.  This is what makes my kiddos inhale these yummy muffins.  I add just enough so that each muffin has a few chocolate chips but not enough to make them overly chocolately.  Bake about 15 minutes until the tops are golden brown.  

We were out of chocolate chips so I finely chopped a square of baking chocolate.

Sometimes we have to just "check out" for the day.  We gather our family around us, ignore the demands of society and just celebrate one another.  That's what I'll be doing later today as I struggle to consume enough chocolate to keep me awake until bedtime...

Friday, September 16, 2011

Seasons

If you've ever been to my house you know that we love to celebrate seasons and holidays.  We'll take any excuse for a party and fun decorations, right?  Celebrating fall in TX can be a little challenging.  I mean it's hard to think pumpkins, mums, apple cider around a fire and falling leaves when we're hanging out at the pool trying to stay cool in the 100+ degree heat.  Add in that our fall decorations are currently MIA in a cavernous storage unit and I was tempted to skip straight to christmas.  But a little voice in my head echoed over and over, "fall...pumpkins...crafts..."  I couldn't ignore the voice.  No, I don't need a psychiatrist.  I have a 6 year old who talks constantly is very articulate and loves crafts, fun decorations and parties as much as his mama!  Who could resist this face:


This is where Pinterest came to my rescue.  Love that site!  I found this felt & yarn leaf garland.  I love the colors and bold simplicity.  And it was something the kids could help me do so it was perfect I thought.


fall-leaves-garland-diy-project-.html.jpg


Then a craft project morphed into a life lesson for mommy.  Isn't that always how it happens?  The meaningful always seems to hit me in the midst of the most mundane.  Just another craft project became a lesson in letting go.  I didn't cut out the leaves for them.  I didn't control the project.  I let go of my need to have the end result look just the way I intended.

I made a little more progress in living in the now and embracing this "season" in my life.  I have small children.  Strike that, I embrace my life with my small children.  I love experiencing life and all it's transitions and changes through their eyes.  Their innocent wisdom teaches me lessons that I can never return in teaching them their ABC's or how to read.

So, on this day I handed over the scissors, a plastic yarn needle, yarn and a stack of felt.  My children gave me a renewed sense of love for seasons.

And their garland...it's perfect!


Ignore the empty hurricanes.  Can't decide what the fill them with...


Try handing over the scissors next time.  You never know what you might get back!


Wednesday, September 14, 2011

Homemade Play Dough


Play Dough.  You love it or you hate it.  Unless you're like me and clear cut black/white makes you edgy then you have a love/hate relationship with the smooshy, moldable stuff that preschoolers love.  Yes it's messy but any mom with a parenting book or internet access knows the developmental benefits of giving your kids a chunk of this stuff.  Add in some plastic utensils and cookie cutters and your Mom of the Year Award will be in the mail!

I, however, am not a fan of the store bought stuff.  It's too dry, hard, full of chemicals and too expensive for what it really is.  So, we make our own.  Then we get all the fun science, math lessons that go along with the cooking of it too!  Here is our favorite recipe:

In a saucepan combine:
1 cup flour
1/4 cup salt
1 tsp cream of tartar

Add and whisk until smooth:
1 cup water
1 tablespoon vegetable oil
food coloring (this is where it gets fun!  Be creative.  Make pastels, dark bold colors, combine colors, etc. but use the liquid coloring.  The color will darken as it cools.)

Cook over medium heat (I prefer medium low) until the play doh is nearly set.  Don't let it get completely set at this point or it will be too dry later on.

Add 1 tablespoon vanilla extract (or another extract that smells good but is clear in color or it will change the color of you play doh) and stir until blended.

Remove from heat and knead play doh until smooth.  Store it in a sealed plastic bag or bowl and this stuff will seriously keep for months.

And, if your 6 month old decides to eat a chunk, no nasty chemicals to hurt her!